
Ring Laser Engraving: How to Engrave a Ring with RA2 Pro
Nowadays, engraved rings are quite popular and preferred over common rings. People love to have their names, special dates, tag lines, titles, and other texts engraved on the ring.
Engraving gives a special meaning, distinct look, and certain memories to the rings. Therefore, people prefer to wear engraved rings and present them to their loved ones.

Whether you want to engrave rings for yourself, loved ones or your clients for business purposes, you need to learn how to do it correctly.
In terms of perfect engraving results, laser engraving is a commendable way of engraving a ring due to its ultra precison. But it is not as easy as engraving flat objects because of its shape. It requires special attachments, extra precision, and some expertise to get the job done with perfection.
In This Article
- Can You Laser Engrave Rings?
- How to Set Up Rotary Attachment 2 Pro for Ring Laser Engraving?
- How to Engrave a Ring?
- Final Words
Can You Laser Engrave Rings?
Yes. When engraving a ring with a laser engraver, a rotary attachment is needed to rotate the ring 360 degrees during engraving, making sure the graphic is engraved evenly on every side and corner.
Keep in mind that common rotary attachments are not suitable for rings because they cannot hold the ring in place and keep it stable. There is a special ring rotary that has special studs to hold the ring.
xTool Rotary Attachment 2 (RA2) Pro is a 4-in-1 rotary attachment that works as a ring rotary, sphere rotary, roller rotary, and chuck rotary. It is an all-in-one attachment that can be transformed into anyone required.

It can work in 90% of the


4-in-1 Rotary Attachment for Laser Engravers

How to Set Up Rotary Attachment 2 Pro for Ring Laser Engraving?
RA2 Pro comes pre-assembled, but it is a roller rotary. So, if you want to change it into a ring rotary, you need to assemble it accordingly. All parts of the ring rotary are available in the box, so you only need to fix them in the right place. Plus, you will also find the tools required for the assembly.
Here are the step-by-step instructions to assemble the ring rotary.
Step 1: Disassemble the Rotary Drive Shafts
The roller rotary of RA2 Pro is pre-assembled. So, we have to take out the extra parts first before fixing the parts of the ring rotary. First, you need to disassemble the two slave-drive shafts of the rotary.

Turn the rotary upside down and loosen the screws of the shaft. There will be two screws at the bottom plate. Loosen both of them and take out the adjustable slave-drive shaft.
Now, you need to remove the second slave-drive shaft. It also has two screws on the coupling. Remove the first screw and then turn the shaft a bit to remove the second one. Once the screws are out, take out the shaft.

Step 2: Attach the Belt Pulley to the Motor Shaft
At this stage, we have taken out the extra parts from the rotary. Now, we need to fix the parts required for the ring rotary. First, rotate the shaft coupling until its flat face faces downward. Then, attach the belt pulley to the motor shaft. Turn the attachment upside down and tighten two screws. You might need to turn the shaft to install the second screw.

Step 3: Assemble the Chunk Rotary
For making a ring rotary, we need to make the chuck rotary first. Once the chuck rotary is ready, we need to attach the ring studs. So, we will assemble the chuck rotary. Put the belt on the pulley and place the chuck on the attachment. Attach the belt to the chuck. Finally, you need to insert two M4*20 screws to fix the chuck.
Step 4: Assemble the Ring Studs
Once the chuck is installed, you need to put the stud components. These components hold the ring in its place. You can tighten the studs with your finger; there is no need for a tool.
Now, the ring rotary is ready. You can start engraving rings.
How to Engrave a Ring?
xTool D1 Pro is a high-precision diode laser engraving machine for ring engraving. It is perfect for beginners, small businesses, DIY lovers, professionals, and artists. If you want to start an engraving business, it could be the right choice. You only need to follow a few simple steps to get the ring engraved.

Step 1: Connect the Laser Engraver with Software
Get your xTool D1 ready. Turn it on and connect it to your computer. Open xTool Creative Space and make sure the machine is connected with the software.
Step 2: Increase the Height of the Laser Machine
For rotary attachment, you need to increase the height of D1. You can use risers to increase the height as much as needed.
Step 3: Measure the Ring
Place the ring rotary in the engraving area. Measure the width and circumference of the ring. Some materials can be directly engraved, but some require tempera paint, transfer tape, or cold galvanizing compound.
You can apply that if needed before placing the ring. After that, place the ring on the ring studs and tighten the chuck using the key. The ring should be in its proper place to remain stable during engraving.
Step 4: Set up Engraving Settings
Upload the graphic on the software. You need to adjust its size and rotation according to the ring. Adjust the position of the laser module and its focus. Set the power and speed of the laser on the software. You can use this material setting table to use the ideal settings.
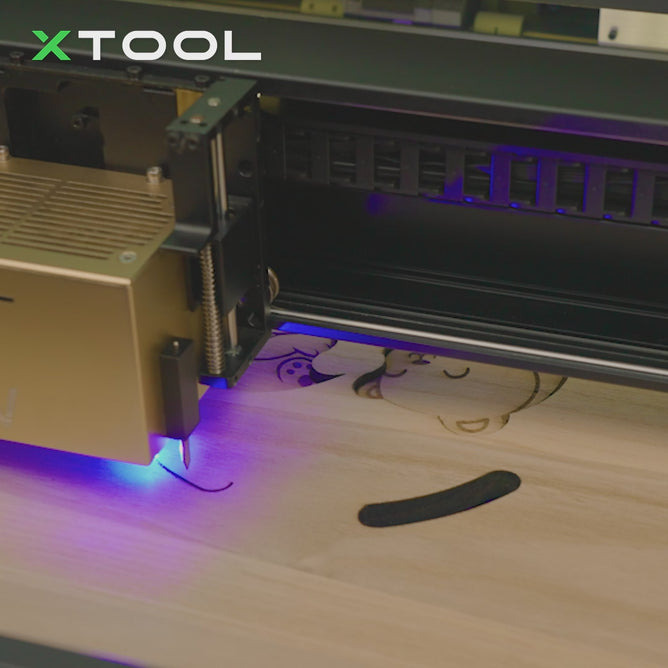
Step 6: Start Engraving
Before starting engraving, turn on Cylinder Working and use the framing feature to ensure the ring and laser module are in the right positions. When you are ready, click on the Start button. It will start the engraving. Now, you only need to wait for it to finish.
xTool S1 Enclosed Diode Laser Cutter


Final Words
If you are using xTool S1 and RA2 Pro, engraving rings is a breeze. RA2 Pro is a 4-in-1 rotary attachment, so it can work on almost any type of commonly used cylinders. You only need to assemble the ring rotary and connect it to xTool S1.
For more questions. Please join our Facebook group to get inspired!